SimRod experience: From Belgian blocks to vehicle durability testing (part 1)
Vehicle durability testing definitely belongs to the critical testing when developing a new vehicle. Until today, OEMs worldwide spend extensive budgets and a lot of efforts to develop durable and lightweight vehicles, running on low fuel consumption. In this blog post I’d like to share with you an effective approach to durability testing.
Let me start from the beginning…
Belgian blocks…

Everybody, who has ever done some durability test runs on a proving ground, knows what Belgian blocks are. For those who doesn’t know, Belgian blocks are these huge blocks of stone used to create a rough road profile on one or several proving ground tracks. These tracks are then used to replicate the durability load inputs that a vehicle experiences over its life time, and to test when one or more components break.
But why are these cobblestones called “Belgian blocks”? I never questioned this, until one of my (non-durability) colleague engineers asked me this question. Why aren’t they called for example “German” or “Indian blocks”? Unfortunately, I could not immediately answer that question, so I needed to look it up myself.
Apparently, the term “Belgian block” has some historical connection to when European ships set sail from ports such as Antwerp, in search of goods to trade. These large stone blocks were typically used for paving, borders and a wide variety of landscaping projects, but they were also useful as ballast for ships that were too light to cross the ocean. So, when the ships belly would be filled with goods purchased direction Europe, these blocks of stone would be left behind there. In many cases they were eventually used for street paving of the U.S. port cities such as Boston, New York, Charleston. The term has simply stuck and today’s very large granite cobblestone style blocks are being referred to as Belgian blocks.
Thank you, Mr. Google !
Durability measurement campaign
Now why do I start talking about Belgian blocks ?
Some time ago, I needed to perform a durability test campaign with one of our new electric vehicles on a proving ground in Aldenhoven, near Aachen in Germany.
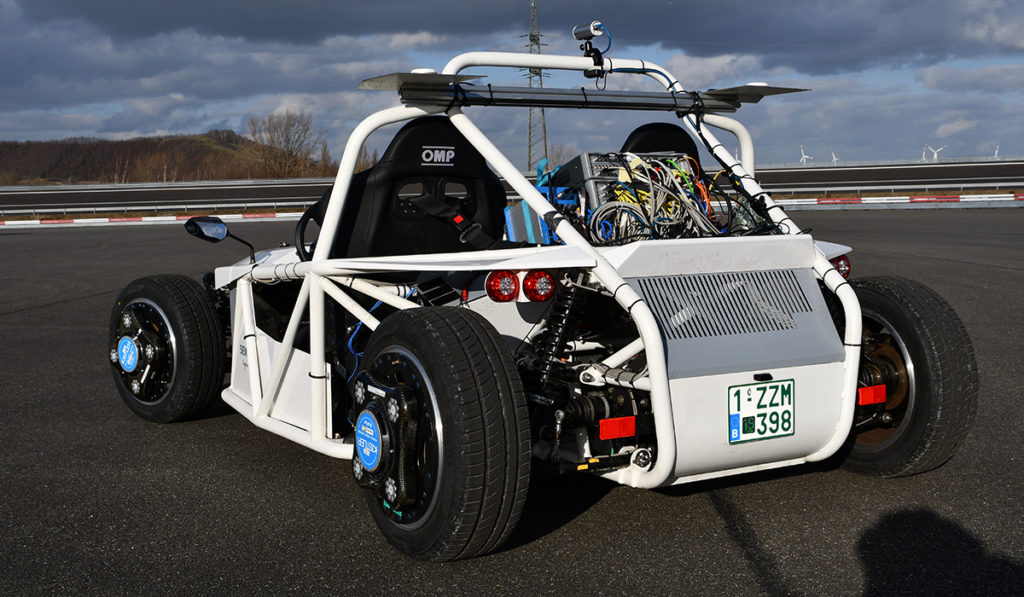
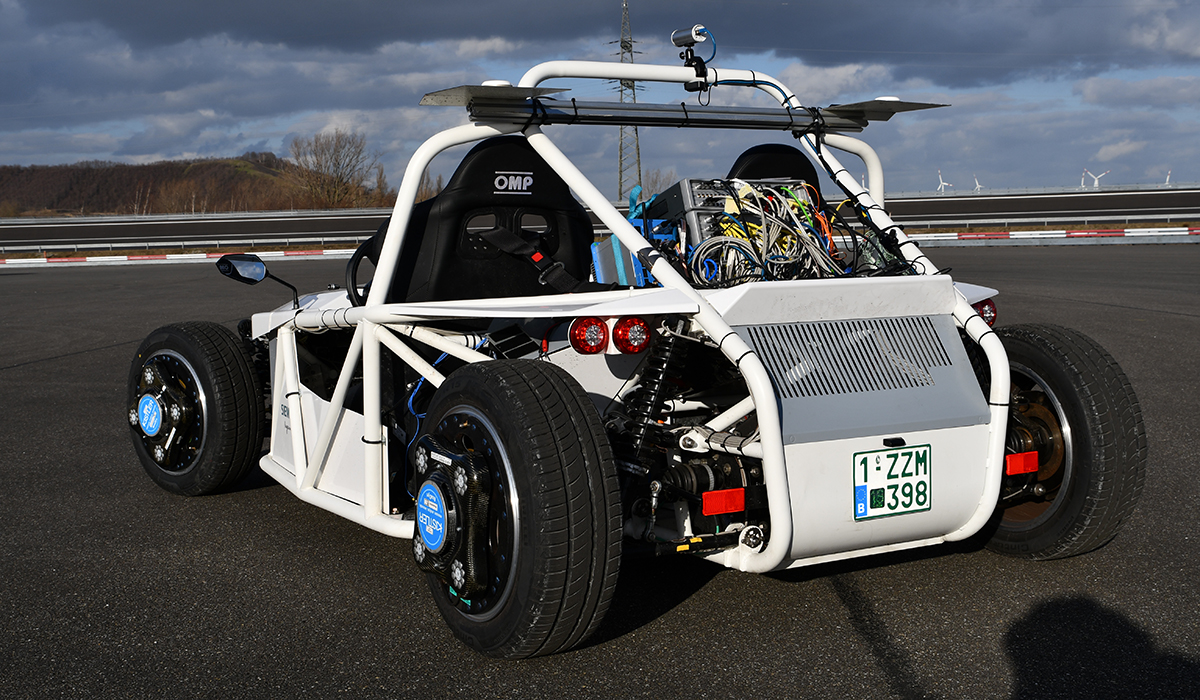
The vehicle that we were going to test, is a full electric sports car. It is made by an electric car manufacturer in Switzerland. Their core business is making small electric vehicles for delivery or logistics companies who would like to reduce their ecological footprint in the world. For our marketing activities, to showcase our Simcenter test & simulation solutions, we bought a couple of these electric sports cars and called them SimRod.
What is a vehicle durability test campaign?
Basically, it is instrumenting a vehicle with different sensor types and connecting them to a measurement system. Then you drive with this vehicle over different types of roads to measure the load inputs acting on the vehicle. And finally, you calculate from these loads how long your vehicle or specific components will survive before they break.
Why different types of durability sensors, you ask?
Well, to answer that question, you need to answer the question: “Why does my vehicle break?” The answer to that is: “Due to the loads that act on your vehicle while driving it”. And these loads can be many things, like displacements, accelerations, but mainly stress and strain. Stress and strain are related to each other but have a slightly different meaning. Stress is how much force you have on a specific location of your vehicle component. Strain is how much your component will be bend due to these forces or loads. And measuring all these different types of quantities require different types of sensors: accelerometers, displacement sensors, force cells, … and strain gauges.
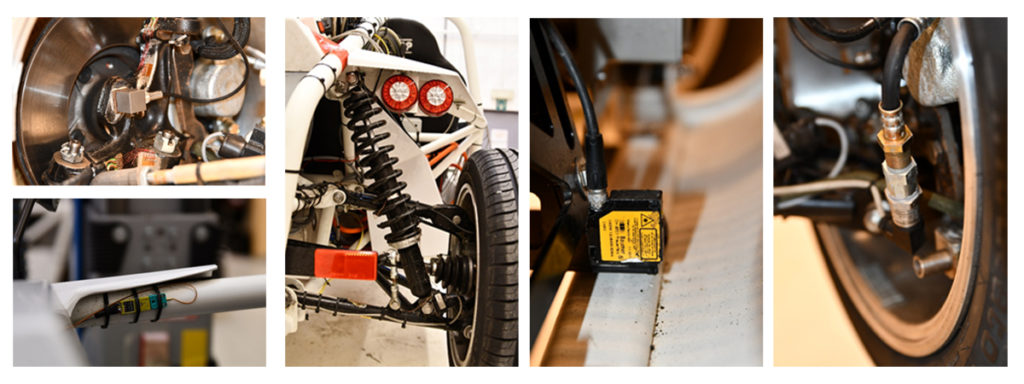
Vehicle instrumentation
Choosing the right strain gauge
It all begins with selecting the right strain gauge for the job. The choice, of which strain gauge you need to use, depends on many things. For example, the size of the surface you want to measure, the direction of the expected strain, and the material of the object itself. Also the condition in which the object (and strain gauge) will be used is very important. Do you need a protection against dust and/or water? What is the expected temperature range of the object and environment?
So, you have many different types of strain gauges to choose from. And if you choose the “wrong” one, it is possible that your test results will be “influenced” and you draw the wrong durability performance conclusions out of it.
Preparing the surface before applying the strain gauge
Once you have selected the right strain gauge, you need to prepare the surface on which you will stick the strain gauge. Preparing means degreasing, abrading, scrubbing, drying … and this repeated several times until the surface is 100% clean.
Selecting the optimal glue
Then you can glue the strain gauge onto the cleaned surface, but not before you have selected the right glue. This is not some regular household glue, which you find in every grocery store. No. Also the right type of glue depends on the strain gauge type, the environment, temperature, … Again, choosing the wrong glue might have an impact on the test results.
Making robust connections
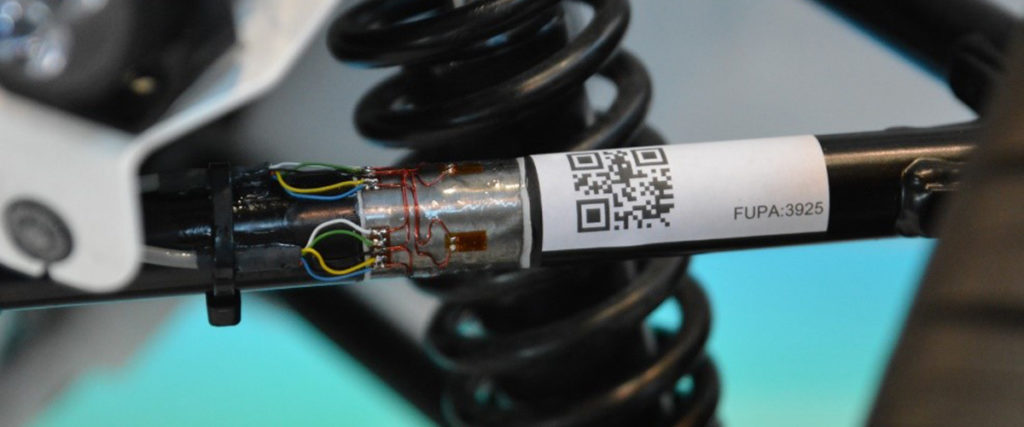
Once you have managed to fix the strain gauge on the object, you still need to solder electrical wires to the strain gauge in order to connect it to your measurement system. Since performing vehicle durability tests on Belgian blocks track causes a lot of loads and vibrations to the vehicle and the strain gauge connections, you do not want to stop the measurement after each run just because your strain gauge connection has fell off. So, you need to make sure you solder on the other side of the strain gauge cable a robust connector. The durability measurement modules of the Simcenter SCADAS Recorder, for example, have a Lemo connector interface. Lemo is seen as one of the most robust connectors in the world.
Fastening cables to the vehicle
Fixing the cables onto vehicles also needs special attention. Again, you do not want to be forced to stop the measurement because one of the cables fell off. Or even worse, it damaged your vehicle or measurement system. So, each cable needs to be fastened thoroughly with, for example tie wraps, onto the vehicle suspension or body. And this needs to be done from the location of the strain gauge all the way to the location of the measurement system inside the vehicle. Depending on this location, your cable needs to be longer or shorter and needs more or less fixation points.
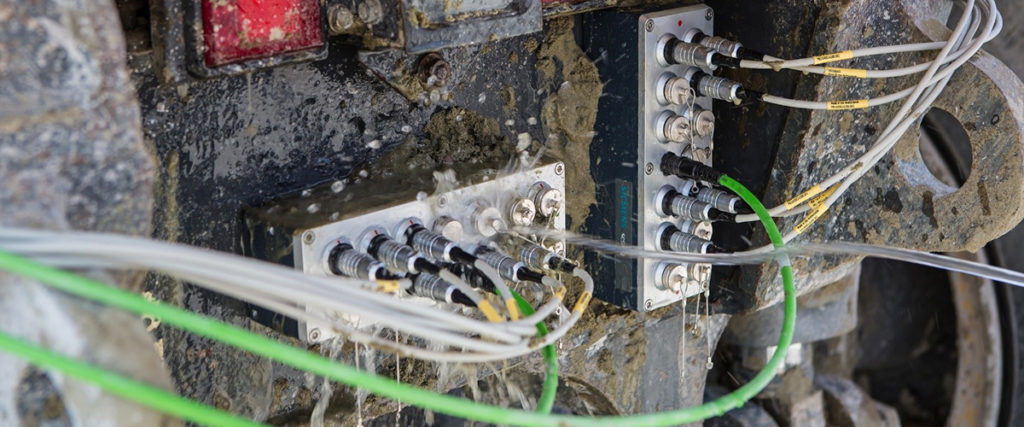
Cables are very expensive, so for large(r) vehicles – like trucks or buses – this cost can become very high, let alone the time you need to fix all these lengthy cables. So, for these types of vehicles, we have developed the Simcenter SCADAS Satellite. They can be seen as remote (and rugged) measurement modules, which can be put very close to the actual sensors. So like this, you only need a short cable between the sensor and Simcenter SCADAS Satellite unit. With only one single cable the Simcenter SCADAS Satellite can be connected to the central Simcenter SCADAS acquisition system. Through this single cable, power and the data is streamed to the central data acquisition (DAQ) system.

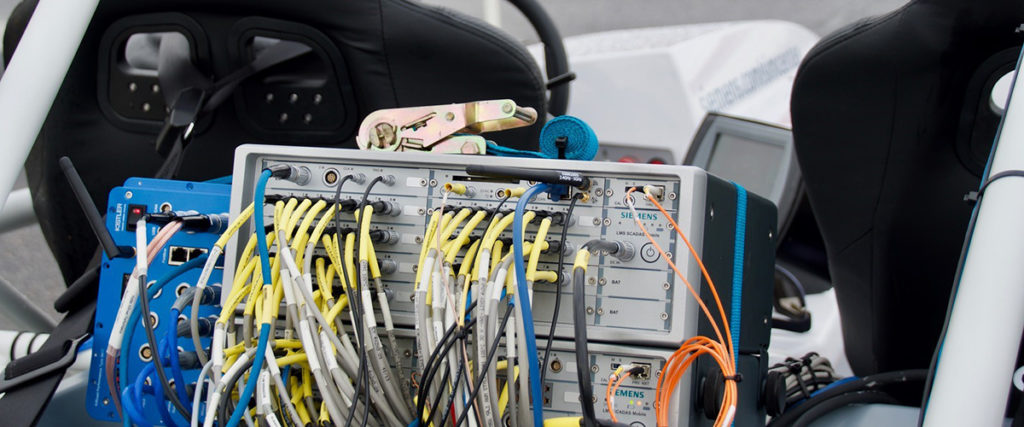
The SimRod is a rather small vehicle, but for the sake of the demo we have also used a couple of Simcenter SCADAS Satellite units in the front part of the vehicle. You can see them whenever we display the SimRod on one of our events or exhibitions. You also see it on the picture below.

Don’t underestimate the workload !
All the above – cleaning, glueing, soldering & cable fastening work – takes about 1 hour … per strain gauge … for an experienced technician. Yes, you have read it right: 1 hour per strain gauge! When I also tell you that the average number of strain gauges used for a typical durability measurement campaign goes from 70 till even up to 200, I think you understand this type of work is not for the hasty ones. You need time, patience and experience.
On our SimRod we “only” used about 50 strain gauges.
For the instrumentation work of my durability test campaign, luckily I could fall back on our experienced Engineering services team. We have engineering teams located in different parts of the world, serving our customers in several test and simulation domains. So, they do also support our customers in all the different steps of a full durability campaign – from instrumentation to data processing and reporting.
Checking the strain and sensor instrumentation
The vehicle is ready: it is instrumented with different types of sensors, mounted in those specific locations, where you want to measure the quantities of interest, so you are good to go … But not before you first check if the instrumentation is done properly! There is nothing as annoying as performing a full day of test runs on a proving ground and then realize that several sensors did not give the expected output.
What could be the wrong output ? It could be that the sensor direction is wrong (giving a negative output where it should be positive), incorrect scale of the measured value (measured values are for example 3 times bigger than what is expected), only noise, no output at all (flat line), and so on…
All these things can be checked by performing a couple of simple test runs.
Hassle free data viewing
Now, since it would be too difficult and also uncomfortable to use a PC to check the data while driving, we used the Simcenter Testlab Control app. This is an app running on any Android device with which you can easily check your data on the spot. No need to upload the measured data to a PC, no need to connect this device to the data acquisition system with a wire. No, with this tool you can stay seated in the vehicle and see during (or right after) the measurement the data being streamed wirelessly from the DAQ to the screen of your Simcenter Testlab Control App.
The app gives you a clear and crisp overview of the measured data as simple numerical values, but also as more detailed time series or online calculated statistics values. So just enough information for the user to decide if the data is good enough for further processing, or to be deleted and redo the measurement.
Instrumentation test runs
To check if the mounting direction of the sensors were correct, we drove several times a ‘8-figure’ on an abandoned parking lot and also did an ‘acceleration-brake’ test – we accelerated from standing position and then braked.
Driving the ‘8-figure’ gave us information on the correlation between the sensors on the left and right side of the vehicle: when the vehicle is turning to the left, the strain gauges on the right (depending on how they are mounted of course) should be showing a ‘compression’ result, while the ones on the left should show the opposite ‘tension’ result. We have also mounted a potentiometer on the steering wheel axle measuring the rotation of this axle, so we can use this channel later on to nicely cut our data based on the rotation angle of the steering wheel.
Accelerating and braking gave us information on the correlation between the front and rear sensors on the car. Here we have put a sensor (rotary potentiometer) on the brake pedal, to measure its angular position. This allowed us later on – when processing the data – to link the measured loads to the actual maneuver performed with the car.
Since the GPS location of the vehicle is measured automatically with the standard embedded GPS receiver in the Simcenter SCADAS Recorder, this also helps us to define on which track a specific test was executed. Especially, when performing a durability test campaign on the public road, having this GPS data comes in very handy!
During all these tests, we also checked the correlation between the different types of sensors. When for example turning left with the vehicle, we checked if the displacement sensors on the front right wheel gave the same “type” of output (magnitude, direction, …) as the strain gauges and accelerometers on that side of the vehicle.
Keep advancing your vehicle durability testing knowledge
Now, you know all the important steps a durability engineer needs to take before going to the proving ground and executing the actual durability test runs. Check out the next part of this blog post where you will learn about the following steps, tips and hack.


Comments
Comments are closed.